
WARNING - This tool should not be used with Syniti Data Workbench version 10 or later. It should also not be used to upgrade to version 10 or later. In version 10 and later, the components of this tool were written into the core product.
DISCLAIMER - The Upgrade and Migration Tool has been developed to automate the execution of common guidelines, steps, and repairs that have been provided by Syniti Software Support to address many different Data Workbench situations over the years. The actions executed are non-destructive and thoroughly logged (details below). If a problem occurs in the tool, please open a Support ticket to report it. Our primary goal will be to work with you to complete your upgrade, migration, or repair of Data Workbench, with or without the Upgrade and Migration Tool. While the tool itself is not officially licensed or supported, we will make note of the problem in case the tool can be updated to prevent it.
Overview
The Upgrade and Migration Tool (UM Tool) assists users in any of these activities:
- upgrading their Data Workbench server installation*
- copying their Data Workbench server installation* to a new machine and upgrading it there (the upgrade is optional)
- repairing their Data Workbench server installation*
*These actions can also be performed against "standalone" Data Workbench installations. A "standalone" is one that does not connect to a server installation of Data Workbench.
Required Items
Please prepare the following before running the UM Tool:
- Installation Media (not needed for "Repair") - When using the UM Tool to Upgrade and/or Move an installation of Data Workbench, part of the process will wait for you to run the desired installation media. This media (and the installation manual) can be downloaded from syniti.com/download-links.
- SQL Server name - There are 3 possible scenarios for the value of the SQL Server Name:
(Enterprise Server Name or Enterprise IP Address)\Quadrate - This SQL Server name is used by default when you install Data Workbench.
(Windows Server Name or Windows Server IP Address)\Quadrate - In some cases, DBAs will have one Windows Server where all the SQL Servers are installed. In this case, instead of using the Enterprise Server Name or IP Address, the Windows Server Name or Windows IP address will be used.
No Instance Name (or Different Instance Name) - In the rarest case, there won't be an instance name at all just the Windows or Enterprise address or it will be different than the \Quadrate default one. - qasUser SQL Server login password - When running the UM Tool, if you do not know what the qasUser password is, the password will be changed to the default.
- Data Workbench file path - The default Data Workbench file path is "C:\Program Files (x86)\Quadrate". It is possible to install the software in another drive/folder so when running the UM Tool, you have the option to enter a different Path than the default. Whether you enter a different path or use the default, if the UM Tool can not find the expected files, you will need to find out where the path is before proceeding with the UM Tool.
Download and run the Upgrade and Migration Tool
- Download the tool
- Open File Explorer and find the folder where the file was downloaded.
- Move the file to a specific folder on the Data Workbench server (or "standalone" computer) to hold the UM Tool. There will be database backups plus log files written out to the folder where the Tool is run from.
- Right-click on the DataWorkbenchUpgradeAndMigration.exe file and select 'Run as Administrator'.
Logs
There will be 2 different types of log files written to the same folder where the DataWorkbenchUpgradeAndMigration.exe file is located.
- DWBUpgradeAndMigration.log - This log file contains the steps that are being run for the option that was chosen from the UM Tool. This file will be updated each time the UM Tool is run from that directory.
- ChangeLog_YYYMMDD_HHMMSS.txt - This log will be created if there are any records inserted in the QAS database. The log name will contain the current date/time. This log file will contain a list of the records that are written to the QAS database.
Using the Upgrade and Migration Tool
There are 3 different scenarios when the UM Tool would be used:
- Upgrade to the latest Data Workbench version in place (currently 9.13)
- Move Data Workbench to a different server (and optionally upgrade)
- Repair Data Workbench (This option can be used for any version of the Data Workbench and should resolve any error that you receive when the Data Workbench won't start.)
Upgrade to the latest Data Workbench version in place (currently 9.13)
- Run the UM tool and choose the 1st radio button, upgrading the Data Workbench to the latest version on the same server/pc and click the "Next" button. The 1st radio button has this text:
I am upgrading the application to its latest version. The application will be in the same server or computer as the previous version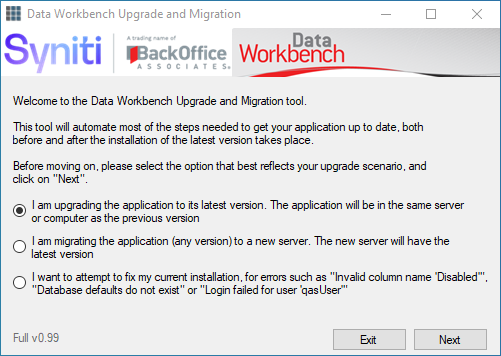
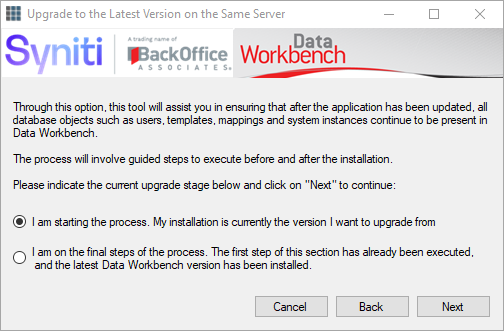
- Choose the 1st radio button which will backup the current QAS database and click the "Next" button.
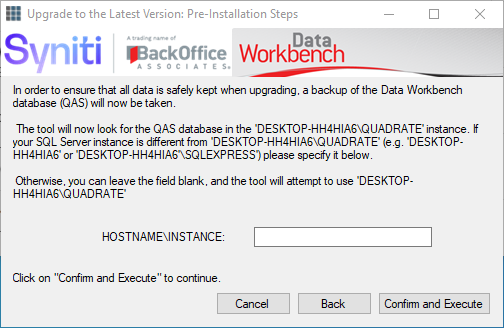
- The default value for the HOSTNAME\INSTANCE will be the server that the UM Tool is executing. (Please review the SQL Server required information from above if the HOSTNAME\INSTANCE is different than the default.) Click the "Confirm and Execute" button once you have entered the HOSTNAME\INSTANCE or chosen to take the default.
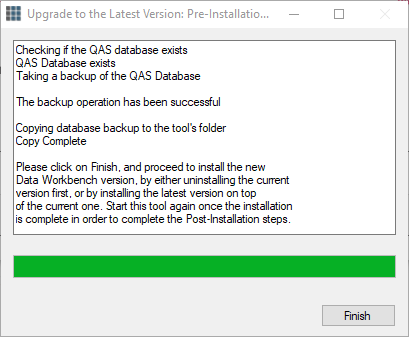
- The QAS database will be backed up and the following screen will display with information regarding the next steps to be done before running the UM Tool to finalize the upgrade. Click the "Finish" button once it becomes enabled. (The information displayed in this screen will be written to the Log File.)
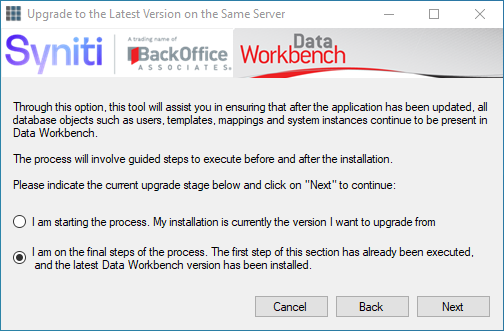
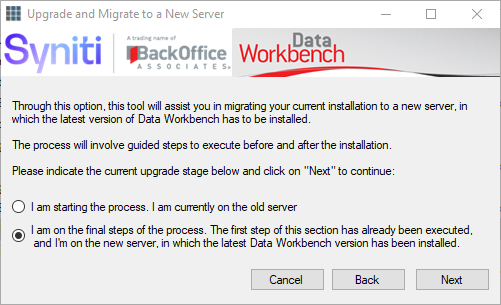
- After installing the latest version of the Data Workbench, run the UM Tool again. Choose the 1st Radio button, upgrading the application on the same server again, but on the below screen choose the 2nd radio button and click the "Next" button.
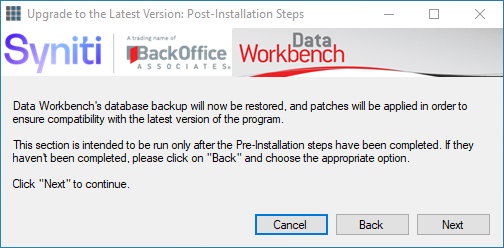
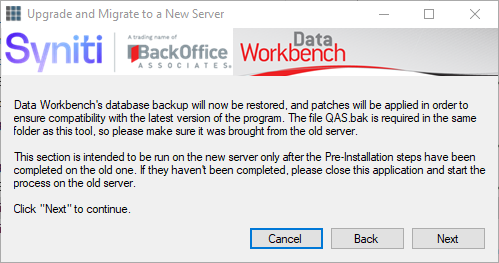
- Review the information on the following screen to make sure you are on the right path and click the "Next" button.
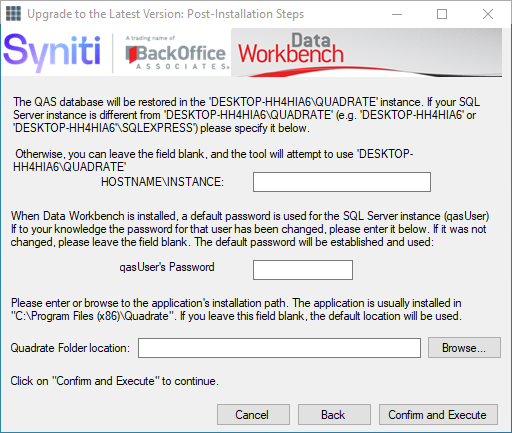
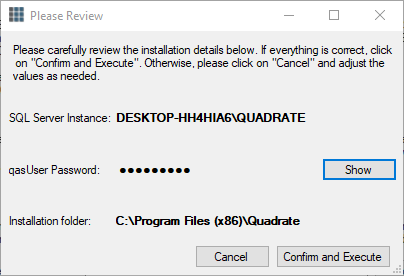
- Enter the data as requested on this next screen and click the "Confirm and Execute" button. (Please review the required information above if unsure of any of the values below.)
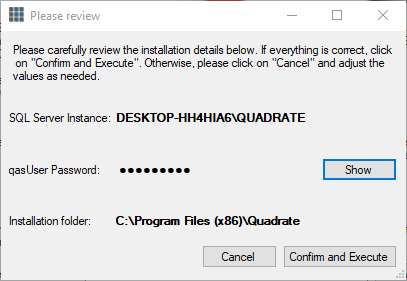
- Click the Show button to display the password. If the information looks accurate, click the "Confirm and Execute" button and the UM Tool will restore the backed up QAS database and update any other information required.
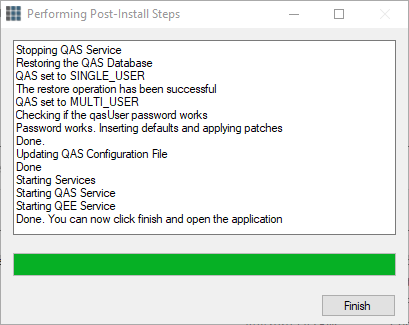
- The following screen will appear and the different processes that run will be displayed. This information along with more details will be written to the DWBUpgradeAndMigration.log file. The records inserted into the QAS database will be logged in the ChangeLog_YYYMMDD_HHMMSS.txt file. Click the "Finish" button once it is enabled.
- Start the Data Workbench and validate that the Data Workbench runs as expected.
Move Data Workbench to a different server (and optionally upgrade)
- Run the UM tool and choose the 2nd Radio Button, upgrading/moving Data Workbench to a new server. The 2nd radio button has this text:
I am migrating the application (any version) to a new server. The new server will have the latest version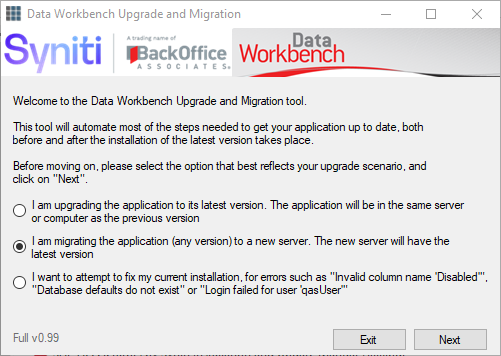
- Choose the 1st radio button which will backup the current QAS database:
- Accept the default or populate the HOSTNAME\INSTANCE field and click the "Confirm and Execute" button. (Please review the required information if unsure of the HOSTNAME\INSTANCE.
*Please note that the license must be deactivated on this server before the backup can be done. An error message will appear if the license is still active.
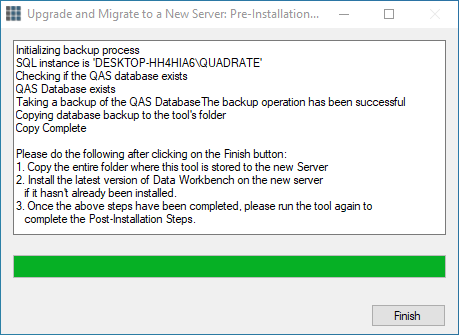
- The QAS database will be backed up and the following screen will display with information regarding the next steps to be done before running the UM Tool to finalize the upgrade/move. This information along with more details will be written to the DWBUpgradeAndMigration.log file
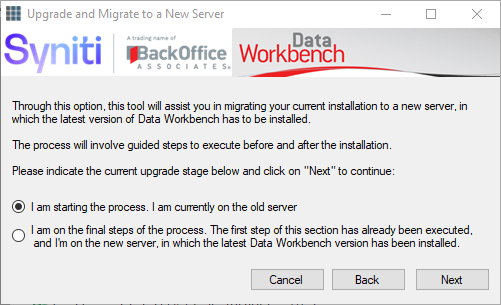
- After copying the UM folder over to the new server and installing the appropriate version of Data Workbench, run the UM Tool on the new server. Choose the 2nd radio button on the first screen as before but on the below screen choose the 2nd radio button this time:
- Review the information on the below screen and click the "Next" button if the pre-steps have been done.
- Review and update any information needed on this screen and click the "Confirm and Execute" button. (Please review the required information as needed for the values of the below fields.)

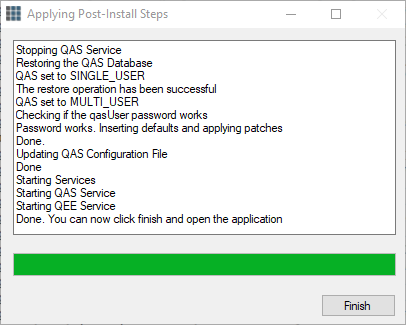
- Please review the data on this final screen and then click the "Confirm and Execute" button to run the post-install steps.
- The following screen will appear and the different processes that run will be displayed. This information along with more details will be written to the DWBUpgradeAndMigration.log file. The records inserted into the QAS database will be logged in the ChangeLog_YYYMMDD_HHMMSS.txt file.
- Start the Data Workbench and validate that the Data Workbench runs as expected.
Repair Data Workbench
- Run the UM tool and choose the 3rd Radio Button, attempt to fix the current installation. The 3rd radio button has this text:
I want to attempt to fix my current installation, for errors such as "Invalid column name 'Disabled'", "Database defaults do not exist" or "Login failed for user 'qasUser'"
- Enter the required information in the following screen and click the "Confirm and Execute" button. (Please review the required information as needed for the values of the below fields.)
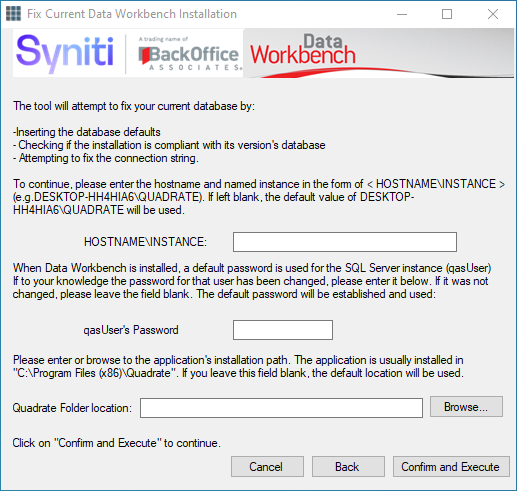
- If the information displayed on this screen is accurate, click the "Confirm and Execute" button.

- The following screen will appear and the different processes that run will be displayed. This information along with more details will be written to the DWBUpgradeAndMigration.log file. The records inserted into the QAS database will be logged in the ChangeLog_YYYMMDD_HHMMSS.txt file.
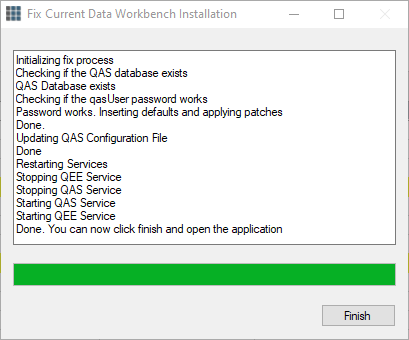
- Start the Data Workbench and validate that the Data Workbench runs as expect